
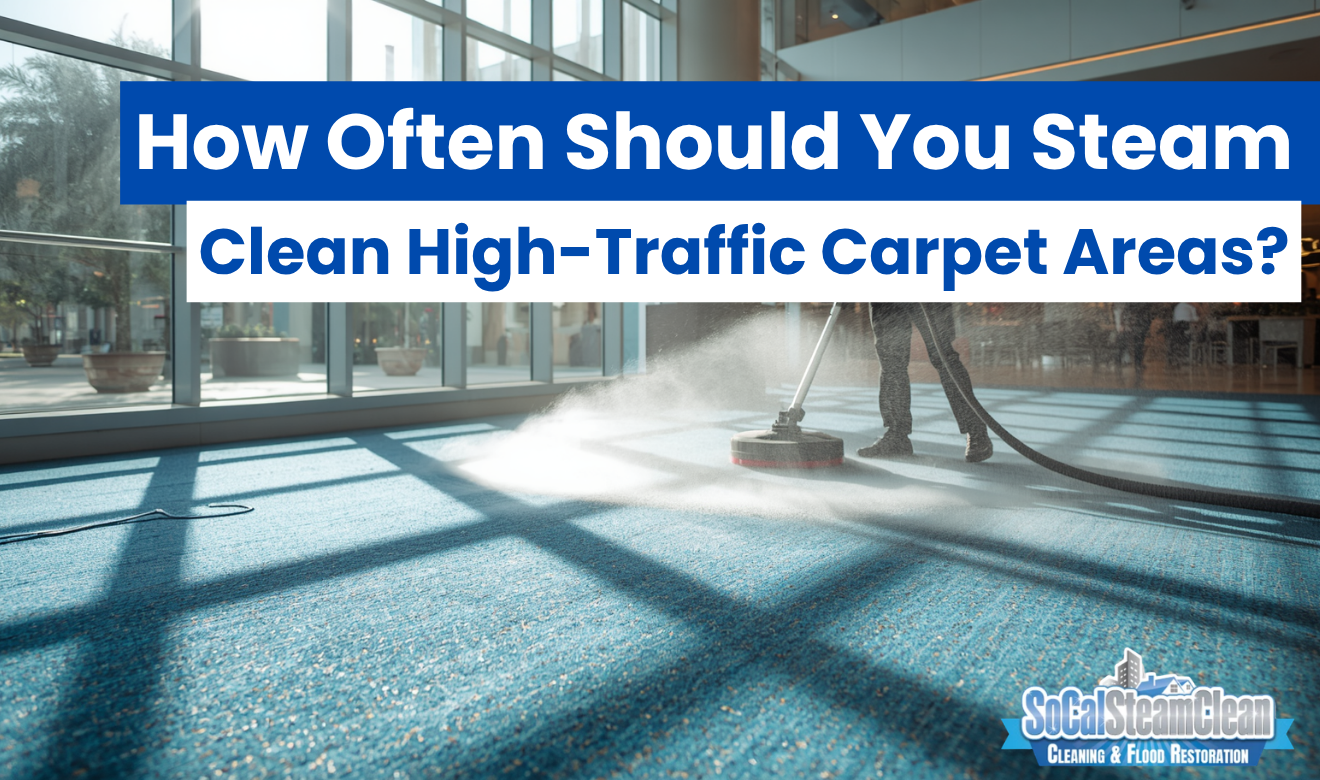
How Often Should You Steam Clean High-Traffic Carpet Areas?

steam cleaning for high traffic carpets

Executive Summary

Steam cleaning (hot water extraction) is most effective for high-traffic carpet when done on a routine schedule, because it removes embedded abrasive grit and oily film that vacuuming can’t reach. The right frequency depends on real-life factors like pets, kids, shoes indoors, and allergy sensitivity—typically every 2–6 months for walk lanes.

Key Takeaways

  • High-traffic zones wear faster because soil is abrasive: Entryways, hallways, stairs, and living-room walk lanes collect gritty particles that grind into fibers and accelerate matting and discoloration.

  • Steam cleaning targets what vacuuming leaves behind: Hot water extraction removes embedded fine soil, oily residue, allergens, and odor sources that cause dull “traffic lanes” and lingering smells.

  • Use a condition-based cleaning schedule: Most homes should steam clean high-traffic areas every 3–6 months, while pets/kids/allergies often justify every 2–3 months; low-traffic rooms typically need 6–12 months.

  • Routine maintenance prevents permanent-looking traffic shading: Waiting until carpet looks “really bad” increases the chance of persistent discoloration, stubborn odors, and fiber abrasion that cleaning can’t fully reverse.

  • Results last longer with good habits and proper technique: Frequent slow vacuuming, doormats, shoes-off practices, immediate blotting, and avoiding over-wetting/soap residue reduce re-soiling and recurring spots.

For most homes, steam cleaning for high traffic carpets every 3 to 6 months is a good baseline. If you have kids, pets, or frequent guests, aim for every 2 to 3 months. If it’s a light-traffic space, once or twice a year may be enough.

Think about the carpet right inside your front door, the hallway everyone uses, or the path from the couch to the kitchen. Those “walk lanes” collect gritty dirt fast, and that dirt acts like sandpaper on the fibers. If you notice the pile looking flat, colors looking dull, or there’s a lingering odor even after vacuuming, it’s probably time to steam clean.

For example, a busy entryway that sees shoes and wet weather might need steam cleaning each season. A living room where kids sprawl with snacks could benefit every 2 to 3 months. And a carpeted office you use a few days a week might only need a deep clean every 6 to 12 months.

What counts as “high traffic” carpet (and why it gets dirty so fast)

High traffic carpet is any area that gets repeated footfall day after day—especially where people turn, stop, or track in grit from outside. Those zones don’t just look dirty faster; they wear faster because soil grinds into the pile.

Common high-traffic zones

  • Entryways and foyers
  • Hallways and stair runners
  • Living room “walk lanes” between seating and kitchen
  • In front of sofas, beds, and desks (pivot points)
  • Doorways to patios/backyards (especially with pets)

Why dirt damages carpet fiber

Most tracked-in soil is abrasive (think tiny mineral particles). In high-traffic areas, repeated stepping pushes grit deeper, where it rubs fibers like sandpaper. That’s one of the biggest reasons steam cleaning for high traffic carpets isn’t just cosmetic—it’s protective maintenance.

How steam cleaning for high traffic carpets works (and what it actually removes)

“Steam cleaning” is often used as a catch-all term for professional hot water extraction. In practice, it uses hot water and cleaning solution to suspend soil, then powerful vacuum extraction to pull out moisture and contaminants. If you want a deeper explanation of methods and terminology, see carpet cleaning.

What steam cleaning for high traffic carpets is best at

  • Embedded soil removal: grit and fine particles packed into walk lanes
  • Allergen reduction: dust and debris that vacuuming may not fully capture
  • Oil/film removal: body oils and cooking residue that make fibers look dull
  • Odor source removal: spills and organic residues that feed odor-causing bacteria

What it may not fix by itself

  • Permanent stains: dyes (sports drinks, some inks) may require specialty treatment
  • Bleaching or color loss: chemical damage can’t be reversed by cleaning
  • Worn pile: crushed fibers may improve after grooming, but wear is wear

In other words, steam cleaning for high traffic carpets removes the stuff causing discoloration and odor, but it can’t rebuild fibers that have been physically worn down.

What schedule makes sense: a practical frequency chart

If you’re trying to decide how often to book steam cleaning for high traffic carpets, use your real-life conditions—not just the calendar. Kids, pets, shoes-in-the-house, and nearby construction all push you toward more frequent deep cleaning.

Home situation High-traffic areas (entry/hall/living lanes) Lower-traffic rooms (guest room/office)
No pets, no kids, shoes-off household Every 4–6 months Every 9–12 months
Kids or frequent guests Every 2–4 months Every 6–9 months
Pets (shedding, accidents, outdoor access) Every 2–3 months Every 6–9 months
Allergies/asthma or “sensitive” household Every 2–3 months Every 6 months

These ranges keep most homes ahead of the “dull lane” look and help steam cleaning for high traffic carpets do its job before soil becomes a wear issue.

Why steam cleaning for high traffic carpets is a maintenance step, not a once-in-a-while fix

High-traffic carpet gets dirty in layers. Vacuuming handles surface debris, but walk lanes accumulate embedded grit and oily film over time. Waiting until the carpet looks “really bad” often means:

  • More permanent discoloration
  • More fiber abrasion and matting
  • Higher chance of stubborn odors
  • More time (and cost) needed to correct it

Steam cleaning for high traffic carpets works best when it’s routine—before soil becomes bonded and before walk lanes turn into visible traffic shadows.

How to tell it’s time: fast “yes/no” checks

If you want a quick, featured-snippet-friendly test, use this checklist. If you answer “yes” to two or more, schedule steam cleaning for high traffic carpets.

  • Yes/No: Does the carpet look darker along the main walkway than the edges?
  • Yes/No: Does the pile look flattened where people walk or pivot?
  • Yes/No: Do socks pick up grime after walking across the room?
  • Yes/No: Is there a lingering odor even after vacuuming?
  • Yes/No: Have there been spills in the last 60–90 days?
  • Yes/No: Do you have pets that lounge on the carpet daily?

What you can do between deep cleans to make results last

The easiest way to reduce how often you need steam cleaning for high traffic carpets is to reduce soil load and keep grit from reaching the base of the fibers.

Habits that help (and take minutes)

  • Vacuum walk lanes slowly 2–4x per week (more during rainy or windy seasons).
  • Use doormats outside and inside every exterior door to trap grit.
  • Shoes-off policy or at least “no outdoor shoes past the entry.”
  • Spot clean immediately (blot, don’t scrub) to prevent wicking and browning.
  • Rotate furniture slightly so traffic patterns don’t grind the same line forever.

Quick spot-cleaning rules to avoid making stains worse

  • Blot first: press with a white towel to lift moisture.
  • Use cool water for protein stains (blood, dairy); hot water can set them.
  • Don’t over-wet: too much liquid can push residue into the pad.
  • Rinse and blot: leftover detergent attracts soil, making spots return.

These steps don’t replace steam cleaning for high traffic carpets, but they extend the “just cleaned” look and reduce re-soiling.

Cost: what influences the price of steam cleaning for high traffic carpets

Pricing varies by market and carpet conditions, but the cost usually changes based on the complexity and risk of the job more than the “square footage number” alone.

Main cost drivers

  • Total area + number of rooms (more edges, corners, and transitions take longer)
  • Soil level in walk lanes (heavily impacted traffic areas may require extra passes)
  • Stains and spotting needs (dye, tannin, oil, or rust each require different chemistry)
  • Pet accidents and odor treatment (may involve subsurface work)
  • Stairs (labor-intensive and slower to extract thoroughly)
  • Dry time goals (additional airflow or low-moisture steps can affect cost)

If odors are part of the problem, pairing steam cleaning for high traffic carpets with targeted Odor Removal is often more effective than masking smells with fragrance.

How long it takes to dry (and how to speed it up)

Dry time depends on humidity, airflow, carpet thickness, and how thoroughly the system extracts water. The most reliable way to reduce dry time after steam cleaning for high traffic carpets is airflow.

Ways to speed drying

  • Run HVAC fan mode for continuous air movement.
  • Use ceiling fans + box fans pointed across (not down into) the carpet.
  • Keep windows open if outdoor humidity is low; close them if it’s humid outside.
  • Avoid walking on damp carpet with shoes—oils and dirt transfer fast.

Tip: If you’re cleaning during a humid or rainy week, plan for a longer dry window and prioritize steam cleaning for high traffic carpets early in the day for maximum airflow time.

What about allergies, dust, and indoor air quality?

Carpet can hold dust and allergens, but the bigger issue in high-traffic zones is what gets tracked in: outdoor soil, pollen, and fine particulate. The U.S. Environmental Protection Agency notes that indoor air can be more polluted than outdoor air, and controlling sources plus cleaning is part of improving indoor air quality (see EPA guidance on indoor air quality at epa.gov).

Practically, steam cleaning for high traffic carpets helps by removing built-up debris that gets stirred up during everyday movement—especially in hallways and living room lanes.

How to avoid common steam-cleaning mistakes in high-traffic areas

High-traffic zones are where DIY and rushed cleanings tend to backfire. Here’s what to watch for so steam cleaning for high traffic carpets actually improves the carpet instead of creating new issues.

Mistakes that cause “spots that come back”

  • Overusing soap: residue attracts soil and reappears as gray lanes.
  • Over-wetting: moisture can reach pad/backing and wick soil upward later.
  • Not rinsing: detergents left behind keep grabbing dirt.
  • Scrubbing aggressively: can distort fibers and fuzz the pile.

Example: the recurring hallway stain

A common scenario is a hallway spill that was “cleaned” with too much detergent. It looks better for a week, then a gray shadow returns right in the walk lane. The fix is usually a true hot-water extraction rinse to remove residues—one reason professional-grade steam cleaning for high traffic carpets is so effective in busy walkways.

If you want more practical do’s and don’ts for preventing reappearing spots and traffic shading, this guide is helpful: carpet cleaning tips.

When stains and odor need more than steam cleaning

Steam cleaning for high traffic carpets is the go-to for general soil, but some situations need specialized spot or odor work.

Situations that call for targeted treatment

  • Pet urine: often penetrates into pad/subfloor; surface cleaning alone may not remove odor.
  • Red dyes: sports drinks and some candies can permanently set without proper chemistry.
  • Grease/oil: requires solvent or emulsification steps before extraction.
  • Mildew odors after water exposure: may indicate moisture below the surface.

If the carpet has been wet from leaks or flooding, don’t rely on steam cleaning for high traffic carpets alone—wet padding can hold odor and support microbial growth if not dried properly.

Why professional equipment matters most in walk lanes

Walk lanes are compacted and loaded with fine grit. Consumer rental machines often lack the heat stability, vacuum lift, and airflow needed to rinse thoroughly and extract moisture in those dense, dirty zones.

What “better extraction” changes

  • Less residue: better rinsing reduces the sticky film that causes rapid re-soiling.
  • Faster drying: stronger vacuum recovery means less water left in the carpet.
  • More uniform appearance: traffic lanes blend better with low-traffic edges.

That’s why steam cleaning for high traffic carpets tends to deliver the biggest visible difference in hallways, entries, and in front of couches—areas where DIY machines struggle most.

How to prep your home so the cleaning is more effective

Prepping takes 15–30 minutes and can noticeably improve results and speed. Before steam cleaning for high traffic carpets:

  • Pick up floor items (toys, cords, small furniture, pet bowls).
  • Vacuum if possible, especially along edges and under front of sofas.
  • Identify problem spots (spills, pet areas) so they can be pre-treated correctly.
  • Plan a “dry path” to limit foot traffic while the carpet dries.

Clean Carpet, Longer Life: the trust markers that matter

For the best results from steam cleaning for high traffic carpets, look for technicians trained in recognized industry standards and methods. In carpet and textile care, reputable credentials commonly include IICRC technician training (Institute of Inspection, Cleaning and Restoration Certification) and hands-on experience with fiber ID, stain chemistry, and hot water extraction procedures.

High-traffic carpet doesn’t need guesswork—it needs consistent maintenance, correct chemistry, and strong extraction. Stick to a realistic schedule, handle spots quickly, and use steam cleaning for high traffic carpets as a routine part of protecting your investment.

Frequently Asked Questions

How often should you steam clean high-traffic carpet?
For most homes, steam cleaning for high traffic carpets every 3–6 months is a solid baseline. If you have kids, pets, frequent guests, allergies/asthma, or you keep shoes on indoors, aim for every 2–3 months. Light-traffic rooms can usually be done every 6–12 months.
Is steam cleaning good for high-traffic carpet?
Yes—steam cleaning (hot water extraction) is one of the best methods for high-traffic areas because it removes embedded gritty soil, oily film, and odor-causing residues that vacuuming can’t fully reach. This isn’t just cosmetic: removing abrasive grit helps reduce fiber wear in walk lanes.
How do you know when carpet needs steam cleaning?
It’s time if you notice darker traffic lanes, flattened pile in walk paths or pivot points, dull color, socks picking up grime after walking across the room, or lingering odors even after vacuuming. If you answer “yes” to two or more of those signs, schedule steam cleaning for high traffic carpets.
How long does carpet take to dry after steam cleaning?
Dry time varies by humidity, airflow, carpet thickness, and extraction strength, but you can speed it up with airflow: run the HVAC fan, use ceiling/box fans pointed across the carpet, and ventilate only if outdoor humidity is low. Avoid walking on damp carpet with shoes to prevent transferring oils and dirt back into the fibers.
Why do carpet stains come back after steam cleaning?
Recurring spots usually come from residue (too much soap or not enough rinsing) that attracts dirt, or from over-wetting that pushes contamination into the pad and causes wicking as it dries. Professional steam cleaning for high traffic carpets helps prevent this by thoroughly rinsing and extracting moisture—especially in compacted hallway and entryway walk lanes.

Ready to Bring Your “Walk Lanes” Back to Life?

If your entryway, hallway, or living room paths are looking dull, feeling crunchy underfoot, or holding onto that “something’s off” smell, don’t wait until the traffic shadows set in. SoCal Steam Carpet specializes in steam cleaning for high traffic carpets—lifting the gritty, fiber-wearing soil that vacuuming can’t reach, so your carpet looks better, feels softer, and lasts longer. Book a deep clean now and get ahead of the wear.
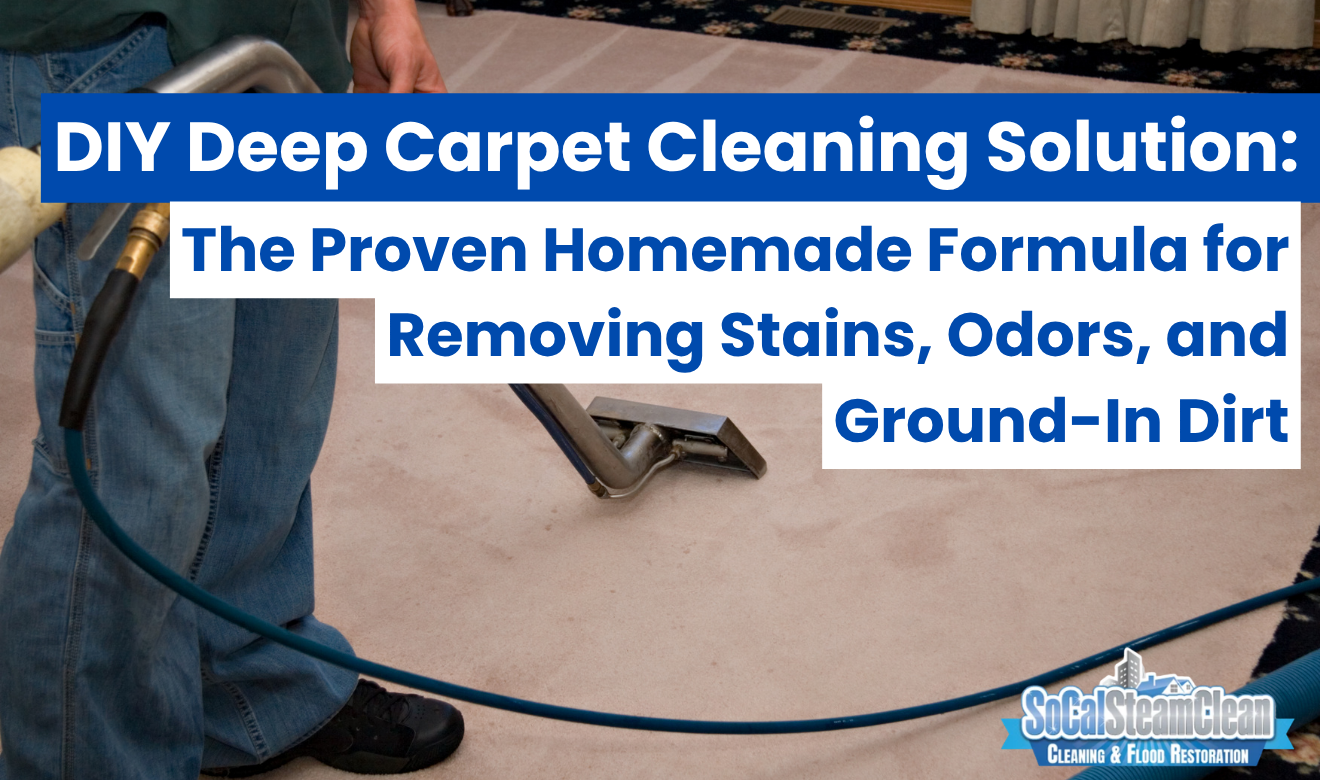
DIY Deep Carpet Cleaning Solution: The Proven Homemade Formula for Removing Stains, Odors, and Ground-In Dirt

DIY deep carpet cleaning solution

Executive Summary

A reliable DIY deep carpet cleaning solution uses hot water, white vinegar, and a tiny amount of clear dish soap, then requires a plain-water rinse and thorough extraction to avoid residue, overwetting, and rapid resoiling. For best results, work in small sections, prioritize dry soil removal first, and force fast drying (ideally 6–12 hours) to prevent musty odor and wicking.

Core Insights

  • Rinse + Extraction Are Non-Negotiable: The rinse step removes loosened soil and leftover surfactant so fibers don’t feel sticky or re-soil quickly.
  • Control Moisture to Prevent Wicking and Odor: Light misting, small 3 ft x 3 ft sections, and multiple slow dry passes reduce pad wetting and recurring stains.
  • DIY Has Clear Limits: If urine has reached the pad, stains wick back after drying, or fibers are wool/silk/dye-sensitive, professional tools and chemistry are the safer and more effective solution.

A DIY deep carpet cleaning solution is a homemade mix that lifts ground-in soil, breaks down oily stains, and neutralizes odor compounds in carpet fibers. This approach works best on synthetic wall-to-wall carpet and most area rugs when you control water use and rinse well. A proven baseline formula uses hot water, white vinegar, and a small amount of clear dish soap, then follows with a clean-water rinse to prevent sticky residue that attracts new dirt. In a local home, you can pre-treat a high-traffic hallway lane by misting the solution, agitating with a soft carpet brush in two directions, and extracting with a wet/dry vacuum or portable extractor in slow passes. For pet odor near a living-room sofa, apply the mix lightly, blot, then sprinkle baking soda after the area is just damp, and vacuum once fully dry to pull remaining odor sources from the pile. For ground-in entryway grit tracked in from sidewalks or parking lots, vacuum slowly in overlapping passes first, then clean in small 3 ft x 3 ft sections to keep the backing from over-wetting and to reduce wicking. Always spot-test in a closet corner, keep moisture minimal around baseboards and tack strips, and run fans or HVAC airflow to dry the carpet within 6–12 hours to prevent musty smells.

What a Deep-Cleaning Carpet Mix Can (and Can’t) Do

A homemade deep-cleaning mix is designed to suspend soil, loosen oily residue, and reduce odor so it can be removed by extraction and rinsing. It is not a substitute for full hot-water extraction when contamination has reached the pad or subfloor.

Most “dirty carpet” is a combination of:

  • Dry particulate soil (sand, grit, dust) that cuts and dulls fibers if not vacuumed out first.
  • Oily binders (skin oils, cooking aerosols, traffic film) that make fibers feel tacky and hold soil.
  • Water-soluble spills (soft drinks, coffee) that rinse out with controlled moisture and agitation.
  • Odor compounds (pet dander, light urine residue near the surface) that respond to dilution, blotting, and thorough drying.

What a DIY mix typically cannot fix reliably without specialized chemistry and tools:

  • Urine that has soaked into the cushion/pad (odor returns with humidity because the source remains below the face fiber).
  • Dye-based stains (sports drinks, some food dyes) that require professional stain reducers/oxidizers.
  • Delicate natural fibers (wool, silk, some hand-knotted rugs) where improper pH or agitation can cause distortion or dye bleed.

Tools and Materials That Make DIY Cleaning Actually Work

Better results come from controlling three variables: agitation, extraction, and dry time. A few specific tools prevent overwetting and residue, which are the two main reasons DIY carpet cleaning fails.

Use the following basic kit:

  • Vacuum with a beater bar/brush roll (for synthetic wall-to-wall carpet; use suction-only for delicate rugs).
  • Two spray bottles: one for cleaning solution, one for plain-water rinse.
  • White cotton towels (reduce color transfer risk when blotting).
  • Soft carpet brush (hand brush, not a stiff deck brush).
  • Wet/dry vacuum or a small portable extractor for recovery (slow passes matter more than high pressure).
  • Box fan(s) and/or a dehumidifier to shorten drying time.

Avoid tools that tend to damage carpet or cause rapid resoiling:

  • Steam mops (not designed for carpet; can overheat and over-wet localized areas).
  • Rotary scrubbers with stiff bristles on cut pile (can fuzz the yarn tips).
  • Excess soap (leftover surfactant becomes sticky and attracts soil).

Baseline Recipe and Why the Ratios Matter

The safest baseline formula uses hot water for soil suspension, vinegar for mild acidification and odor reduction, and minimal clear dish soap for surfactant action. Keeping soap extremely low reduces residue and prevents “gray lane” reappearing.

Baseline mix (spray-and-extract approach):

  • 2 cups hot water (not boiling; hot tap is sufficient)
  • 1 cup white distilled vinegar (5% acidity)
  • 1/2 teaspoon clear, non-bleach dish soap (no lotions, no antibacterial additives)

Plain-water rinse (separate bottle):

  • 2–3 cups clean warm water

Why this works in practice:

  • Vinegar helps dissolve alkaline residue and reduces some odor compounds, but it does not “sanitize” carpet.
  • Soap lifts oily soil; using more than a tiny amount increases the chance of rapid resoiling.
  • Rinsing is what prevents sticky fiber and recurring dirt lanes.

Step-by-Step Process (Small Sections, Controlled Moisture)

Deep cleaning is most effective when done in 3 ft x 3 ft sections with a strict sequence: dry soil removal, light application, agitation, extraction, and rinse extraction. This minimizes wicking and speeds drying.

  1. Vacuum slowly first
    • Make 2–4 overlapping passes in two directions (north–south, then east–west).
    • Spend extra time on traffic lanes and entry transitions.
  2. Spot-test
    • Choose a closet corner or hidden edge; apply solution lightly, blot, and check after drying for color transfer or texture change.
  3. Apply the solution as a mist
    • Do not soak. The carpet should be evenly damp at the tips, not saturated to the backing.
    • Keep spray 8–12 inches above the pile to avoid overwetting a single point.
  4. Agitate gently
    • Brush in two directions to lift the pile and work soil to the surface.
    • Avoid aggressive circular scrubbing that can distort some constructions.
  5. Extract with slow passes
    • Wet/dry vac: press firmly and move slowly; repeat until minimal moisture is recovered.
    • Portable extractor: use low solution flow if adjustable; take 2–3 dry-only passes after each wet pass.
  6. Rinse and extract again
    • Mist plain water lightly over the same area, then extract thoroughly.
    • This step is what prevents detergent film and stiff, crunchy fibers.
  7. Dry fast
    • Run fans aimed across (not straight down) the surface to increase evaporation.
    • Use HVAC circulation; in humid conditions, use a dehumidifier.
    • Target drying within 6–12 hours to reduce musty odor risk.

Targeted Add-Ons for Common San Diego Household Problems

Different soil types respond to different tactics, even with the same base solution. Matching the method to the problem prevents fiber damage and reduces the chance of spots returning.

High-Traffic “Gray Lane” Soil

Traffic lanes are mostly bonded oily soil plus fine grit, so success depends on thorough vacuuming and rinsing. The goal is to remove sticky binders so new dirt doesn’t reattach quickly.

  • Pre-vacuum slowly, then vacuum again after agitation (before wetting) if you loosen dry grit.
  • Use the baseline mix as a light mist, brush, then extract.
  • Always do a plain-water rinse extraction to avoid rapid resoiling.

Pet Odor Near Sofas and Favorite Resting Spots

Light odor in surface fibers often improves with dilution, blotting, and fast drying. If odor returns during humid weather, contamination is likely below the face fiber and needs deeper treatment.

  • Apply solution lightly, blot (don’t rub), then extract.
  • When the area is just damp (not wet), apply a thin layer of baking soda, let dry fully, then vacuum slowly.
  • If you suspect urine reached the pad (strong odor, repeat odor), limit DIY wetting and consider Odor Removal in San Diego for sub-surface treatment that targets the source.

Entryway Grit (Sand and Hard Particles)

Grit is abrasive and should be removed dry whenever possible because water can turn it into mud that spreads. The priority is extraction control and preventing wicking at the threshold.

  • Vacuum with multiple slow passes and edge-tool along baseboards.
  • Clean in small squares and keep the backing as dry as possible.
  • Place a fan at the entry after cleaning to prevent moisture retention under shoes-off traffic areas.

Carpet Fiber and Dye Safety: What to Avoid

Fiber type determines what chemistry and agitation are safe. Using the wrong product can cause dye migration, fuzzing, shrinkage, or permanent yellowing.

  • Avoid bleach (sodium hypochlorite) on carpet fibers; it can permanently remove dye and weaken yarn.
  • Avoid hydrogen peroxide experiments on unknown carpet dyes; oxidizers can lighten color and create permanent “clean spots.”
  • Avoid high-alkaline degreasers on wool; wool is protein-based and is damaged by high pH.
  • Avoid soaking near tack strips and baseboards; excess moisture can lead to odor, rust staining, or delamination of some backings.

If you are unsure what you have, treat the surface as dye-sensitive: minimal moisture, minimal agitation, and strict spot-testing.

Dry Time, Indoor Air, and Moisture Control (Practical Local Considerations)

Fast drying is the single most important factor for preventing musty odor and wicking. In coastal and marine-layer conditions, indoor humidity can stay high even when temperatures are mild.

To shorten dry time in real homes:

  • Create airflow: place a box fan so air skims across the carpet.
  • Reduce humidity: close windows during marine layer; run AC or a dehumidifier.
  • Limit re-wetting: do not repeatedly spray the same area “until it looks clean.”
  • Use clean towels: after extraction, stand on a folded towel to press out additional moisture.

For a broader overview of standard methods (dry compound, encapsulation, hot-water extraction), see carpet cleaning.

Compulsory Specifications Table: DIY Deep Clean Benchmarks

This table converts the process into measurable targets you can follow room by room. Hitting these benchmarks reduces residue, overwetting, and recurring spots.

Feature / Metric Specifications Local Guidelines
Pre-vacuuming standard 2–4 slow, overlapping passes in two directions; edge tool along walls Prioritize entryways and hall lanes where sidewalk grit accumulates; vacuum before any moisture is introduced
Solution strength (baseline) 2 cups hot water + 1 cup 5% white vinegar + 1/2 tsp clear dish soap Use minimal soap to prevent sticky residue that attracts coastal dust and fine sand
Working section size Approx. 3 ft x 3 ft per cycle (apply, agitate, extract, rinse, extract) Smaller sections reduce overwetting and wicking, especially near thresholds and baseboards
Extraction passes 1 wet pass followed by 2–3 dry-only passes (or repeated wet/dry vac pulls) Focus on water recovery to avoid musty odors; airflow + dehumidification if marine layer humidity is high
Target dry time 6–12 hours with fans and ventilation control If carpet remains damp beyond 12 hours, increase airflow and reduce indoor humidity to prevent odor and reappearing spots

When DIY Isn’t the Right Call (and What to Do Instead)

DIY methods are best for maintenance and light-to-moderate soil when you can rinse and dry quickly. If the problem involves sub-surface contamination, repeated spotting, or delicate fibers, professional equipment and chemistry are the safer option.

Escalate beyond DIY when you see:

  • Recurring stains that reappear after drying (classic wicking from pad/backing).
  • Strong pet urine odor that returns with humidity or heat.
  • Large areas of oily soil where residue risk is high and you need controlled hot-water extraction.
  • Valuable or dye-sensitive rugs (handmade, wool, viscose, antique).

If you’re comparing home methods to professional approaches and what results to expect, review carpet cleaning on your own in San Diego for practical context on limitations and best practices.

Room-by-Room Blueprint for Consistent Results

A consistent plan prevents overuse of solution and keeps dry time predictable. The idea is to clean the dirtiest, most used zones first, then finish with lighter areas so fans can run continuously without interruption.

  1. Entry / threshold
    • Vacuum thoroughly; clean only a small zone at a time; rinse and extract.
    • Dry immediately with a fan to prevent wicking at the transition strip.
  2. Hallway traffic lane
    • Mist, brush two directions, extract, rinse, extract.
    • Walk only on dry towels until fully dry.
  3. Living room (around seating)
    • Focus on armrest-side zones and pet resting areas; blot and extract more than you spray.
    • Use baking soda only after the carpet is just damp and you can allow full drying.
  4. Bedrooms
    • Usually lighter soil; minimize solution and emphasize rinse extraction for softness.
    • Keep airflow running until the carpet feels dry at the base of the pile.

Fresh-Carpet Finish: How to Prevent Rapid Resoiling

Post-cleaning habits determine how long the carpet stays bright. The key is removing residue, reducing incoming soil, and maintaining the pile with effective vacuuming.

  • Don’t skip the rinse: it’s the simplest control for preventing sticky fiber.
  • Use walk-off mats at exterior doors and shake/vacuum them weekly.
  • Vacuum high-traffic lanes 2–4 times per week in busy homes; slow passes outperform quick vacuuming.
  • Address spots immediately: blot first, then minimal solution, then rinse-blot.

Clean, Dry, and Residue-Free: The Standard to Aim For

A successful DIY deep carpet cleaning session removes suspended soil and odors without leaving detergent behind or pushing moisture into the pad. The repeatable formula is simple: vacuum thoroughly, apply minimal solution, agitate gently, extract slowly, rinse, and dry fast.

If you keep sections small, prioritize water recovery, and control indoor humidity, you can refresh traffic lanes, reduce everyday odors, and restore a softer feel to synthetic carpet. For persistent odor, recurring stains, or suspected pad contamination, move to a deeper corrective approach rather than repeatedly re-wetting the same area, which increases the risk of wicking and musty smells.

Frequently Asked Questions

What is a safe DIY deep carpet cleaning solution recipe?
A safe baseline DIY deep carpet cleaning solution is 2 cups hot water, 1 cup 5% white vinegar, and 1/2 teaspoon clear dish soap. Keep soap minimal to reduce residue, then follow with a plain warm-water rinse and thorough extraction.
Do I need to rinse after using a vinegar and dish soap carpet mix?
A rinse is required to prevent sticky residue and rapid resoiling. Mist plain warm water over the cleaned section and extract again. This step removes loosened soil and leftover surfactant that can leave fibers stiff or attract new dirt.
How do I use the DIY solution without over-wetting the carpet?
Controlled moisture comes from cleaning in 3 ft x 3 ft sections and applying the mix as a light mist. Agitate gently with a soft brush, then extract slowly with a wet/dry vac or portable extractor and take multiple dry passes.
Does this DIY deep-cleaning solution remove pet odors in carpet?
This DIY solution reduces light, surface-level pet odors through dilution, blotting, and fast drying. Apply lightly, blot and extract, then add a thin layer of baking soda only when just damp and vacuum after fully dry.
When should I avoid DIY deep carpet cleaning and call a professional?
DIY is not appropriate when urine has soaked into the pad, stains wick back after drying, or the carpet is wool, silk, or dye-sensitive. Strong odor returning with humidity indicates sub-surface contamination that needs professional extraction and targeted odor treatment.

Stop Re-Wetting Your Carpet and Hoping It “Dries Fine” — Get a Real Deep Clean That Doesn’t Come Back Worse

DIY carpet cleaning can feel like you’re saving money… right up until the carpet looks clean for a day, then the gray traffic lanes reappear, the fibers feel crunchy, and the room starts smelling musty the next morning. That’s not bad luck — that’s what happens when soap residue stays behind, moisture reaches the backing or pad, and drying time drags on long enough for odor compounds and wicking to take over.

Here are the real risks homeowners run into when they try to deep-clean without professional-grade extraction, controlled chemistry, and fast dry-down:

  • Wicking and recurring stains: the spot “disappears,” then resurfaces as moisture pulls buried soil back up from the backing or pad.
  • Sticky residue that attracts new dirt: even a little extra dish soap can leave a film that makes traffic lanes re-soil faster than before.
  • Overwetting the pad: once moisture gets below the face fibers, DIY tools often can’t recover it — and that’s when odors and long dry times start.
  • Musty smells and indoor air issues: slow drying (especially in coastal humidity) can lock in damp odor that lingers long after the “cleaning” is done.
  • Fiber and dye damage: the wrong chemistry or scrubbing can fuzz yarn tips, distort pile, or create permanent light spots.
  • Pet odor that keeps returning: if contamination reached the cushion, surface cleaning won’t solve the source — it can actually spread it.

If you want your carpet to look better and stay better, the goal isn’t “more solution” — it’s correct agitation, deep extraction, thorough rinsing, and rapid drying so you don’t leave behind the two things that cause most carpet problems: residue and moisture.

Get it done once, get it done right, and get your home back to clean, soft, and truly fresh — without the guesswork, repeat attempts, or that lingering damp smell.

SoCal Steam Carpet

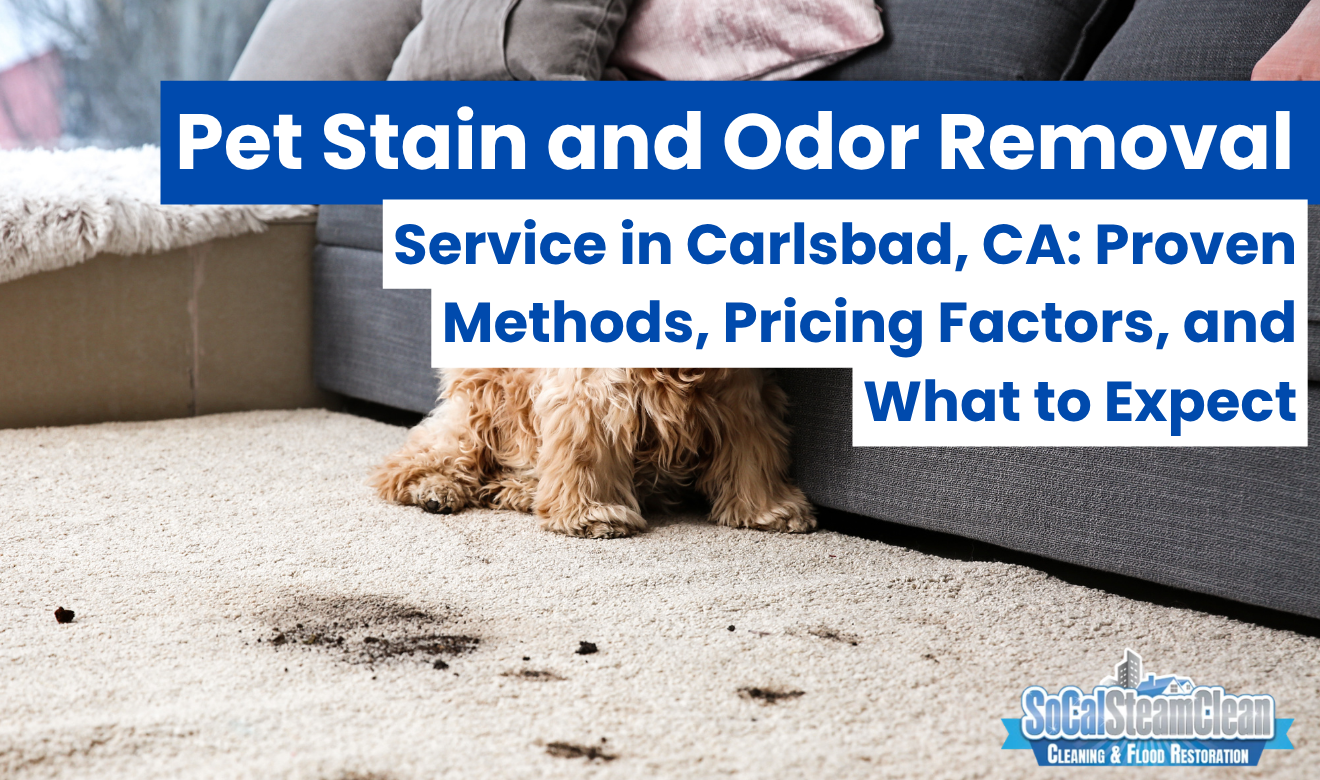
Pet Stain and Odor Removal Service in Carlsbad, CA: Proven Methods, Pricing Factors, and What to Expect

pet stain and odor removal service Carlsbad

Executive Summary

A pet stain and odor removal service in Carlsbad solves odor by locating urine contamination, confirming depth into carpet/pad/subfloor, then using the correct chemistry and extraction (including subsurface flushing when needed) so uric salts can’t re-activate during humid coastal conditions. True success is verified after full dry-down with a final odor and wicking check—not immediately after cleaning.

  • Odor Is a Depth-and-Salts Problem: “Clean” carpet can still smell if uric acid salts remain in backing, pad, or tack-strip zones and rehydrate when humidity rises.
  • Inspection Determines the Correct Plan: UV mapping plus moisture-meter confirmation, fiber testing, and floor-level odor checks are what decide whether topical treatment is enough or subsurface flushing/replacement planning is required.
  • Results Depend on Sequence, Extraction, and Drying: Enzymes/digesters and oxidizers must be applied in the right order with proper dwell time, followed by high-efficiency extraction and rapid drying to prevent wicking and odor return.

A pet stain and odor removal service Carlsbad is a professional cleaning process that extracts pet urine, feces, vomit, and dander residues and neutralizes the odor at the source. In Carlsbad, technicians typically start with UV light inspection to map urine spots in carpet lanes, area rugs, couch cushions, and pet-favorite corners near sliding doors and patio thresholds. Moisture meters are used to confirm whether contamination reached carpet pad or subfloor, which changes the treatment plan and price. Enzyme and bacterial digesters break down uric acid salts, while an oxidizing rinse targets lingering odor compounds that survive normal shampooing. In severe cases, a controlled sub-surface flush is applied through the carpet face to remove salts trapped in pad and tack strip areas, followed by rapid drying to prevent wicking. Pricing commonly varies by the number of affected rooms, square footage, stain age, and whether odor is detectable only up close or across the room on humid coastal days. Expect clear pre-inspection notes, a test spot on fibers, containment steps to protect baseboards, and a final odor check after drying because true results often show once the area is fully dry.

What Professional Pet Odor Treatment Targets (and Why “Clean” Isn’t Always Odor-Free)

Effective pet odor remediation is a chemical and moisture problem first, and a “surface cleanliness” problem second. The goal is to remove or neutralize urine salts and odor-causing compounds so they can’t reactivate when humidity rises.

Pet urine typically contains urea, bacteria, and uric acid that crystallizes into salts. Those crystals can lodge deep in carpet backing, pad, and along tack strips—areas a standard hot-water extraction pass may not fully reach. That’s why many residents notice “it smells fine” immediately after cleaning, then the odor returns days later, especially after foggy mornings or when the home is closed up.

  • Urine salts can remain bonded to fibers and backing unless treated with appropriate dwell time and chemistry.
  • Wicking can pull dissolved contamination back to the surface during drying.
  • High coastal humidity can rehydrate residues and make odor more noticeable across the room.
  • Multiple deposit layers (repeat accidents) can saturate pad/subfloor and require subsurface treatment or replacement planning.

Inspection Protocols You Should Expect in Carlsbad Homes

A professional evaluation should identify where contamination is located and how deep it traveled before selecting tools and chemistry. A real plan starts with mapping, moisture confirmation, and fiber-safety checks.

In a thorough visit, technicians typically follow a repeatable workflow so the results are measurable and the scope is defensible for property managers and move-out documentation.

  1. UV/blacklight mapping to identify likely urine areas on carpets, rugs, upholstery, and baseboard edges.
  2. Moisture meter readings at the carpet face and perimeter transitions to verify whether urine reached pad/subfloor.
  3. Odor intensity check at floor level (kneeling test) and at breathing level to determine whether odor is localized or airborne.
  4. Fiber ID and dye stability test (test spot) before applying oxidizers or high-alkaline pre-treatments.
  5. Containment plan to protect painted baseboards, furniture legs, and adjacent hard surfaces from overspray.
  • Carpet lanes and traffic paths: repeated marking behavior is common along entry lines and near sliding doors.
  • Pet “rest zones”: corners, behind sofas, and under dining tables may show older, oxidized staining.
  • Area rugs: urine can soak through into the rug pad and the floor beneath, requiring dual-surface treatment.

Chemistry Used: Enzymes, Bacterial Digesters, and Oxidizers (Applied in the Right Order)

Professional pet stain and odor remediation uses targeted chemistry to break down organic soils and neutralize odor compounds. The sequence matters because some products deactivate others if layered incorrectly.

Most best-practice approaches use a combination of digesters (to address organic residues) and oxidation (to address stubborn odor molecules and discoloration). Technicians also adjust pH and dwell time based on fiber type (synthetic vs. wool blends) and stain age.

  • Enzyme cleaners: Designed to catalyze breakdown of urine-related soils; require correct dwell time and moisture to work.
  • Bacterial digesters: Introduce beneficial bacteria that consume residual organic material; commonly used where odor is persistent but fiber risk is low.
  • Oxidizing rinses: Used to neutralize odor compounds that survive normal cleaning; must be fiber-safe and properly diluted.
  • Acid rinse / neutralization: Helps return carpet to a stable pH after treatment and reduces sticky residues that attract soil.

Because urine contamination is often below the carpet surface, chemistry alone isn’t enough without correct extraction. If the plan is only “spray deodorizer and steam,” it typically does not address salts in the pad or along the tack strip perimeter.

Subsurface Flush vs. Surface Extraction: How Pros Decide

The deciding factor is depth: if contamination is in the pad or subfloor, surface-only cleaning is often insufficient. Subsurface flushing is designed to dissolve and remove salts trapped below the carpet face.

When moisture meters and odor checks indicate deeper impact, technicians may recommend a controlled sub-surface rinse, followed by high vacuum extraction and rapid drying to prevent re-wicking.

  • Surface extraction (top-down): Best for fresh accidents caught quickly or light marking that didn’t penetrate the pad.
  • Subsurface flush (through the carpet): Used when urine is confirmed in pad/backing or odor is strong at floor level.
  • Pad replacement considerations: If urine saturation is extensive, replacement may be more reliable than repeated treatments.
  1. Pre-condition the affected zone with appropriate urine treatment chemistry.
  2. Controlled rinse/flush to mobilize dissolved residues.
  3. High-efficiency extraction to remove contaminated moisture.
  4. Speed drying with air movers and ventilation to minimize wicking and microbial growth.

What “Safe for Pets and Kids” Actually Means in Practice

Safety is primarily about using products as labeled, controlling residues, and ensuring proper drying—not just choosing a product marketed as “green.” In California, professional operators should follow manufacturer instructions and standard precautions for occupied homes.

Expect clear re-entry guidance, ventilation recommendations, and advice to keep pets off damp carpet until fully dry. If a technician cannot explain dwell time, rinse steps, and drying targets, the process is not being controlled.

  • Ventilation: Open windows where possible and run HVAC fan to accelerate drying.
  • Access control: Keep pets and small children off treated areas until dry to the touch.
  • Residue management: Proper rinse/extraction reduces sticky residues that can attract dirt and cause recurring odors.
  • Fiber protection: Wool and some natural fibers require more conservative chemistry than nylon or polyester.

Service Scope: Carpets, Area Rugs, Upholstery, and Hard-Surface Edges

Odor problems often span multiple materials, so a complete plan includes adjacent surfaces where urine can migrate. Treating only the carpet can miss the true source if contamination reached upholstery, grout lines, or baseboard seams.

In Carlsbad homes, common spread points include rug pads over hard floors, upholstered pet beds on carpets, and repeated marking near patio thresholds. When odor is noticeable but stains are minimal, the source can be in the underlayment or along perimeter edges.

  • Carpet and pad: Most common reservoir for urine salts and recurring odor.
  • Area rugs: May require treatment on both sides; urine can pass through to the floor beneath.
  • Upholstery: Cushion cores can absorb urine; odor can remain even if fabric looks clean.
  • Tile/grout edges: Urine can settle in grout pores at transitions; edge detailing matters.

If additional deep cleaning is needed beyond urine treatment, scheduling carpet cleaning alongside spot remediation can help reset overall soil load so treated areas don’t re-stand out.

Core Service Metrics: What Changes Price and Results

Pricing and success depend on contamination depth, affected square footage, material type, and whether odor is airborne or localized. A professional scope should be based on inspection findings rather than flat assumptions.

Feature / Metric Specifications Local Guidelines
Detection method UV inspection + moisture meter verification to confirm depth (fiber/pad/subfloor) Coastal humidity can re-activate odor; verify after full dry-down before closing the job
Treatment depth Topical treatment vs. subsurface flush through carpet to address pad/backing/tack-strip zones If pad is saturated across large areas, replacement planning is often more reliable than repeated spot flushing
Stain age Fresh stains respond faster; older oxidized stains may require multi-step stain removal + odor neutralization Document pre-existing staining for rentals/move-outs; visual improvement may differ from odor removal outcome
Odor spread level Close-range odor vs. room-filling odor indicating broader contamination or HVAC/soft-goods involvement Perform odor check with doors/windows closed after drying to replicate real living conditions
Drying control High vacuum extraction + airflow to reduce wicking and speed evaporation Aim for rapid dry-down to prevent re-wicking and secondary odor development in pad

DIY Attempts That Commonly Make Odors Harder to Remove

Some consumer products create residue or set stains, increasing labor and limiting outcomes. The most frequent issues are overwetting, masking fragrances, and reactive chemistry combinations.

Technicians regularly encounter carpets that were repeatedly soaked with rental machines or household detergents, pushing urine deeper and spreading it laterally. That contamination footprint can expand beyond the original spot.

  • Overwetting with a rental extractor: Can drive urine into pad/subfloor and cause larger wicking stains.
  • Using steam on protein/organic residues without treatment: Heat can set some staining and intensify odor release temporarily.
  • Fragrance deodorizers: Mask odor but do not remove uric salts; odor returns when fragrance dissipates.
  • High-pH detergents without neutralization: Leave sticky residue that re-soils and can hold odor compounds.

For homeowners trying to understand why a “clean-looking” carpet can still smell, the fundamentals of carpet cleaning help clarify why extraction, chemistry, and drying are treated as one system rather than separate steps.

Verification and Post-Treatment Checks That Separate “Good” From “Done”

Results should be verified after drying because odor behavior changes as moisture evaporates. A final check should confirm no wicking, no sharp ammonia-like notes, and no localized hotspots at floor level.

A professional wrap-up typically includes walk-through notes and clear guidance on when it’s safe to replace furniture, reinstall rug pads, or allow pets back into the area.

  1. Dry-state odor check: Re-inspect after the area is fully dry (or schedule a callback window if needed).
  2. Wicking inspection: Look for reappearing rings or yellowing that indicates subsurface residue moving upward.
  3. Customer verification: Confirm results in typical “odor trigger” conditions (doors closed, HVAC running, normal humidity).
  • Immediate re-soiling prevention: Avoid heavy traffic until dry; replace HVAC filters if odor has been circulating.
  • Repeat-accident prevention: After successful removal, pets are less likely to return to the same spot because scent markers are reduced.

If you want additional practical guidance on maintaining cleaner carpet fibers between professional visits, see carpet cleaning tips in San Diego, which covers day-to-day habits that reduce buildup and help prevent recurring odor zones.

When Replacement or Restoration Is the Correct Recommendation

Some conditions are not efficiently solved with cleaning alone, particularly when urine has penetrated into structural materials. The correct call is based on measurable saturation, repeated contamination, and material limitations.

Indicators that may justify pad replacement or broader restoration planning include persistent odor after correct subsurface treatment, visible delamination, or contamination that has moved into subfloor seams.

  • Carpet pad is saturated across wide areas: Even strong treatment may not fully remove salts embedded throughout the pad.
  • Subfloor absorption: Wood-based subfloors can absorb urine; sealing or targeted restoration may be required after removal.
  • Repeated marking over months/years: Multi-layer deposits can exceed what extraction can remove in a single service window.
  • Health/sensitivity concerns: Occupants with asthma or chemical sensitivities may require stricter controls and more conservative approaches.

Clear Results, Not Just Better Smell: The Carlsbad Standard for Pet Odor Remediation

A high-quality pet stain and odor removal service in Carlsbad is defined by inspection-driven scope, correct chemistry, subsurface capability, and verified dry-state results. When those elements are present, the odor source is removed or neutralized rather than covered up.

Expect a process that starts with UV and moisture confirmation, proceeds with enzyme/digester treatment and controlled extraction (including subsurface flushing when needed), and ends with a documented final odor check after drying. That structure is what prevents recurring smells on humid days, reduces re-wicking, and restores carpets, rugs, and upholstery to a livable condition without relying on masking fragrances.

Frequently Asked Questions

What does a pet stain and odor removal service in Carlsbad actually remove?
A pet stain and odor removal service in Carlsbad removes urine, feces, vomit, and dander residues and neutralizes odor at the source. It targets uric acid salts in fibers, backing, pad, and perimeter tack-strip zones using enzymes/digesters, oxidation, and controlled extraction.
Why can pet odor come back after carpet cleaning?
Pet odor returns when urine salts remain in carpet backing, pad, or subfloor after surface-only cleaning. Coastal humidity can rehydrate residues, and drying can cause wicking that pulls contamination back to the surface. Proper chemistry, dwell time, extraction, and rapid drying prevent recurrence.
What inspection steps should I expect before treatment in a Carlsbad home?
A professional inspection includes UV/blacklight mapping and moisture-meter readings to confirm contamination depth. It also includes an odor intensity check at floor level, a fiber/dye test spot before oxidizers, and a containment plan to protect baseboards, furniture, and adjacent hard surfaces.
When is a subsurface flush needed instead of surface extraction?
A subsurface flush is needed when moisture readings or strong floor-level odor indicate urine reached the pad, backing, or tack-strip perimeter. The process pre-treats, flushes through the carpet, extracts contaminated moisture, and speed-dries to prevent re-wicking and lingering odor.
What factors affect the price of pet stain and odor removal service in Carlsbad?
Pricing depends on affected rooms or square footage, stain age, and whether odor is localized or fills the room in humid conditions. Cost also changes if contamination reached pad or subfloor and requires subsurface flushing, extra extraction, rapid drying equipment, or pad replacement planning.

Stop the Smell at the Source—Before It Soaks Deeper and Costs More

Pet urine isn’t just a “spot on the carpet.” It’s a moisture-and-chemistry problem that can crystalize into uric salts, sink into the pad, cling to tack strips, and quietly re-activate every time Carlsbad humidity climbs. That’s why DIY sprays and rental machines often deliver the same frustrating cycle: it smells “better” for a day… then comes back stronger after everything dries.

And the operational risk of guessing is real. Overwetting can spread contamination wider than the original accident. The wrong chemistry can set staining, damage fibers, or leave sticky residue that attracts more soil. Masking fragrances can make you think you solved it—until the odor returns on a foggy morning or when the home is closed up. Worst case: repeated DIY attempts drive urine deeper, turning a treatable problem into pad replacement, subfloor sealing, or a much bigger restoration decision.

If you want a result you can actually trust, you need an inspection-driven plan: UV mapping to find hidden deposits, moisture readings to confirm depth, fiber-safe chemistry applied in the correct order, and extraction (including subsurface flushing when needed) followed by controlled drying to prevent wicking. That’s how you get “done,” not just “better for now.”

SoCal Steam Carpet