For minor water damage on a floor, the definitive solution is to stop the source, extract all standing water immediately, dry the affected assembly with controlled airflow plus dehumidification, and verify dryness with moisture readings before reinstalling trim or flooring. Escalate to a professional quickly if contamination is possible, materials stayed wet beyond 24–48 hours, or moisture remains elevated near walls, cabinets, or subfloor seams.
- Safety First: Cut power if water is near outlets/appliances, prevent slips, and identify whether the water is clean, gray, or black before beginning cleanup.
- Extraction Beats Evaporation: Remove liquid water fast with towels or a wet/dry vacuum and pull up absorbent layers (rugs/pad) to stop wicking into seams, underlayment, and wall edges.
- Verify, Don’t Guess: Use fans aimed across the surface and a dehumidifier to control humidity, then confirm success with moisture-meter readings trending down to match a dry control area.
What to do for minor water damage on floor means stopping the source, removing standing water, drying the structure fast, and confirming moisture is back to safe levels before rebuilding. Shut off the water supply or stop the spill at the valve, dishwasher line, toilet angle stop, or HVAC condensate drain. Extract water immediately with towels, a wet/dry vacuum, or a pump for deeper puddles. Pull back rugs and remove wet pads so water does not wick into subfloor seams. For hardwood or engineered planks, wipe along the grain and check for cupping at board edges and swelling near baseboards. For laminate, inspect click-lock joints for bubbling and edge lift, since trapped water often sits under the wear layer. For tile, check grout lines and transitions for seepage into underlayment, especially near tubs, showers, and exterior doors. Set high airflow across the wet area with fans, open interior doors, and use a dehumidifier to keep indoor humidity low. Lift a corner of flooring at a transition if possible to verify the subfloor is not dark, soft, or delaminating. Use a moisture meter on wood and subfloor to confirm readings are trending down daily, not rising. Call a pro if water sat longer than 24–48 hours, if there is sewage or gray water, if the subfloor feels spongy, if odors persist, or if moisture readings stay elevated behind baseboards or under cabinets.
Step 1: Make the Area Safe (Electric, Slip, and Contamination Controls)
Before you dry anything, prevent shock hazards, falls, and exposure to contaminated water. Minor water on a floor can still travel under baseboards and reach outlets, appliances, or adjacent rooms.
Use this safety checklist immediately:
- Shut power off to the affected area at the breaker if water is near:
- wall outlets, power strips, extension cords
- dishwasher/disposal wiring under the sink
- floor-level baseboard heaters or low-voltage systems
- Prevent slips by removing throw rugs and placing a towel “walk path” until extraction is complete.
- Identify the water category (used in restoration standards and insurance documentation):
- Clean water: supply line leak, melted ice, rainwater that hasn’t contacted soil or waste
- Gray water: dishwasher discharge, washing machine overflow, tub overflow with soap
- Black water: toilet overflow with feces/urine, sewage backup, water that contacted soil or crawlspace
- Use PPE when water source is uncertain: nitrile gloves and closed-toe shoes; add an N95/respirator if you smell musty odors or suspect mold.
Step 2: Stop the Moisture Migration (Containment and “Wicking” Prevention)
Minor surface wetness becomes major damage when it wicks into seams, underlayment, and drywall edges. The goal is to isolate the wet zone so it doesn’t spread invisibly.
Do these actions in order:
- Block spread paths with dry towels at door thresholds and along transitions (carpet-to-tile, wood-to-tile).
- Remove absorbent layers:
- Pick up bath mats and entry rugs immediately.
- If carpet is involved, lift the corner and check the pad—wet pad holds water against subfloor.
- Pull furniture off the wet zone and place legs on plastic, foil, or furniture tabs to prevent stain transfer and swelling.
- Pop off shoe molding/base shoe (if you can do so cleanly) where water reached the wall edge—this creates an air gap for drying and allows inspection of the drywall “paper line.”
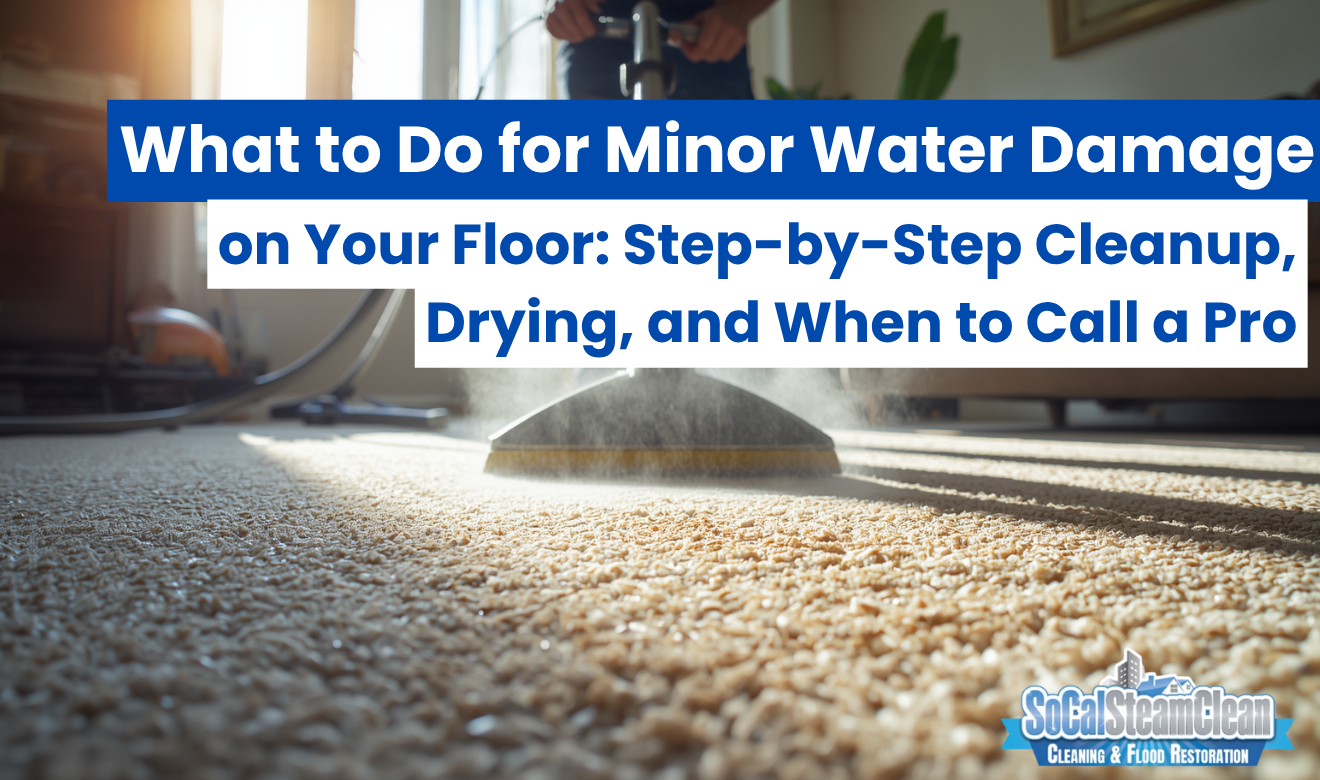
Step 3: Extract Water Fast (Extraction Beats Evaporation)
Extraction is the single highest-impact step because it removes liquid water that dehumidifiers and fans would otherwise take days to evaporate. The faster you extract, the lower the risk of swelling, delamination, and microbial growth.
Use the most aggressive method appropriate for the depth:
- Light film or small spill: microfiber towels pressed firmly; replace towels as they saturate.
- Puddles on hard surfaces: wet/dry vacuum with a squeegee head; make slow passes until no more water is pulled.
- Carpeted area: wet/dry vacuum extraction in overlapping lanes, then repeat at 90 degrees to the first direction.
- Under appliances/toe-kicks: remove the toe-kick panel (often snaps or screws) and vacuum standing water in the cavity.
If the affected area includes carpet fibers that now smell sour or feel sticky, schedule professional Carpet Cleaning in San Diego after drying to flush residues that can re-odor or wick back to the surface.
Drying Targets Table (Moisture, Time Windows, and Local Handling)
This table translates drying into measurable checkpoints you can verify instead of guessing. Use it to decide when DIY drying is sufficient and when a restoration workflow is more appropriate.
| Feature / Metric | Specifications | Local Guidelines |
|---|---|---|
| “Critical time” for drying start | Begin extraction and airflow immediately; microbial amplification risk increases as materials remain wet | If water remains >24–48 hours in porous assemblies (pad, subfloor seams, drywall edges), prioritize professional assessment and drying verification |
| Indoor humidity control | Run a dehumidifier continuously; keep doors open for circulation and close exterior doors/windows if outdoor air is humid | Coastal conditions can slow evaporation; measure RH with a hygrometer and keep indoor RH low enough to maintain active drying |
| Hardwood/wood subfloor moisture verification | Use a moisture meter and track readings daily to confirm a downward trend | Record readings by location (center of room, near baseboards, near the source) for documentation if an HOA/landlord/insurer requests proof |
| Carpet + pad status | Pad that stays wet can re-wet carpet; trapped moisture causes odor and can affect tack strip and subfloor | If pad is saturated or water source is gray/black, replacement is commonly required to return the assembly to a sanitary condition |
Step 4: Set Up Correct Drying (Airflow Pattern + Dehumidification)
Effective drying is a controlled system: airflow lifts moisture from surfaces, and dehumidification pulls that moisture out of the air. Random fans without humidity control often just move damp air around.
Use this proven setup:
- Create crossflow:
- Aim fans so air moves across the wet flooring, not directly down into it.
- Angle one fan to push air toward a hallway or doorway; angle another to pull air out of the area.
- Run a dehumidifier 24/7 and empty the reservoir as needed (or use continuous drain if available).
- Use HVAC strategically:
- Cooling can reduce humidity; heat can increase evaporation, but only helps if the dehumidifier can keep up.
- Do not run the system if you suspect sewage contamination until affected porous materials are removed/cleaned.
- Keep doors open inside for air movement, but limit outdoor air when marine humidity is high.
Material-Specific Checks (Hardwood, Laminate, Tile, and Carpet)
Each floor type fails in a predictable way after moisture exposure. Use the right inspection points so you can decide whether drying alone is enough or if removal is necessary.
Hardwood and Engineered Wood
Wood floors show moisture stress through edge cupping, crowning, and swelling at perimeters. Your goal is to dry evenly and prevent permanent deformation.
- Inspect for cupping (edges higher than the center) and for swollen ends near doorways and baseboards.
- Check under baseboards: staining or softened drywall at the bottom edge indicates water climbed the wall.
- Avoid steam mops and harsh detergents during drying; they add moisture and can damage finishes.
- Do not sand or refinish until moisture readings stabilize; premature sanding can lock in distortion.
Laminate and Floating Click-Lock Floors
Laminate commonly fails at seams because the core swells and breaks the joint. If seams are lifting, drying may not reverse the deformation.
- Look for edge lift, bubbling, and “soft spots” when you step lightly.
- Inspect transitions (T-molding, reducers) and lift them if possible to see whether water is trapped under the planks.
- If swelling is visible, replacement of affected planks is usually required because the fiberboard core does not return to its original dimension.
Tile, Stone, and Grout Lines
Tile surfaces can look dry while moisture remains in grout, thinset, or underlayment. The key risk is hidden saturation at perimeters and transitions.
- Check grout darkening and damp transitions near tubs, showers, and exterior doors.
- Inspect adjacent materials (baseboards, vanity toe-kicks) for swelling—often the first sign that moisture migrated under the tile edge.
- Do not seal grout immediately; sealing over moisture can trap water below and prolong drying.
Carpet and Rug Areas
Carpet assemblies hold water in the pad and at the subfloor interface, which is where odor and microbial growth start. A dry-to-the-touch surface is not proof the assembly is dry.
- Lift a corner and press a dry towel into the pad; if it wets quickly, the pad is still saturated.
- Watch for reappearing spots as water wicks up during drying—this is common after spills and overflows.
- Plan post-dry cleaning to remove residues; the underlying process of carpet cleaning matters because remaining soils can bind odor and stain.
For additional practical guidance on maintaining fibers and preventing long-term staining after moisture events, see carpet cleaning tips in San Diego.
Verification: How to Confirm the Floor Is Actually Dry
Drying is complete only when measurements show the structure has returned to a safe moisture condition. Rely on instruments and consistent documentation, not appearance.
Use this verification workflow:
- Measure baseline moisture in an unaffected area of the same material (a “control” reading).
- Map the wet zone with readings at:
- center of the affected area
- perimeter near baseboards
- near the original leak/spill point
- adjacent room threshold
- Track daily trends at the same points and time of day.
- Confirm stability:
- Readings should move toward the control area and then remain stable.
- If perimeter readings stay elevated, suspect water behind baseboards or under cabinetry.
When “Minor” Isn’t Minor: Clear Triggers to Escalate to a Pro
Certain conditions require professional water damage procedures because the risk is structural damage or contamination, not just cosmetics. Escalate based on objective red flags, not hope.
Call for professional help if any of the following are true:
- Water sat longer than 24–48 hours in contact with porous materials (pad, drywall edges, OSB, MDF baseboards).
- Source is gray or black water (dishwasher discharge, toilet overflow, sewage, or unknown source).
- Subfloor feels soft/spongy or you see delamination (layers separating) on plywood/OSB at edges.
- Persistent odor remains after drying airflow has been running—often indicates trapped moisture or contamination.
- Moisture readings plateau and do not continue downward, especially near walls or cabinets.
- Water entered a shared wall (condo/townhome) where it may have affected an adjacent unit; early documentation and containment reduce liability disputes.
If escalation is needed, a restoration team can combine extraction, controlled demolition (only where necessary), and drying verification. For situations beyond a simple surface spill—especially when water traveled under flooring—consider Flood & Water Damage Restoration in San Diego to address moisture that cannot be reached with household fans.
Documentation for Insurance, Landlords, and HOAs (Do This While Drying Runs)
Accurate documentation protects you if costs expand beyond initial expectations. It also speeds approvals when a carrier, property manager, or HOA requests proof of cause, timeline, and mitigation steps.
Capture the following:
- Photos/video:
- source (angle stop leak, dishwasher line, overflow path)
- standing water and affected rooms
- removed base shoe/transition areas
- any visible swelling, staining, bubbling, or grout darkening
- Timeline notes:
- when you discovered the water
- when the water was stopped
- when extraction began and when fans/dehumidifier were started
- Moisture readings log with location labels (example: “Kitchen—left of dishwasher—baseboard corner”).
- Receipts for equipment rental and materials.
Dry, Verify, Then Restore: The Practical Wrap-Up
For minor water damage on a floor, the winning sequence is always the same: stop the source, extract aggressively, dry with controlled airflow and dehumidification, and verify dryness with measurements before you reinstall anything. Skipping verification is the most common reason small incidents turn into odor, warped flooring, or hidden wall damage.
Use these final decision rules to close the job confidently:
- Only rebuild or reattach trim after moisture readings stabilize close to your control readings.
- Replace materials that permanently swell (common with laminate seams and MDF baseboards) rather than trying to “force dry” them back into shape.
- Escalate quickly if contamination is possible or if moisture persists at walls, cabinets, or subfloor seams.
Frequently Asked Questions
Don’t Let “Minor” Water Damage Turn Into a Major Floor Replacement
A small leak or spill feels manageable—until moisture sneaks under baseboards, gets trapped beneath laminate seams, or saturates carpet pad where you can’t see it. That’s when DIY drying turns into a slow-motion disaster: swelling, delamination, warped planks, persistent odors, and the kind of hidden moisture that can trigger microbial growth and expensive tear-outs later.
Here’s the real problem: fans and towels can make the surface look dry while the subfloor, wall edges, and underlayment stay wet. If you don’t have the right tools and process—targeted extraction, controlled airflow, dehumidification, and moisture verification—you’re basically guessing. And guessing is how small water events become insurance headaches, HOA disputes, or “why does it still smell?” callbacks that cost far more than doing it right the first time.
If water has been sitting for more than 24–48 hours, if the source is gray/black water, if flooring seams are lifting, or if moisture is lingering near walls, cabinets, or transitions, it’s time to bring in a local pro who can find what’s hidden, document the situation properly, and confirm the structure is actually dry before you put everything back together.
Leave a Reply
You must be logged in to post a comment.